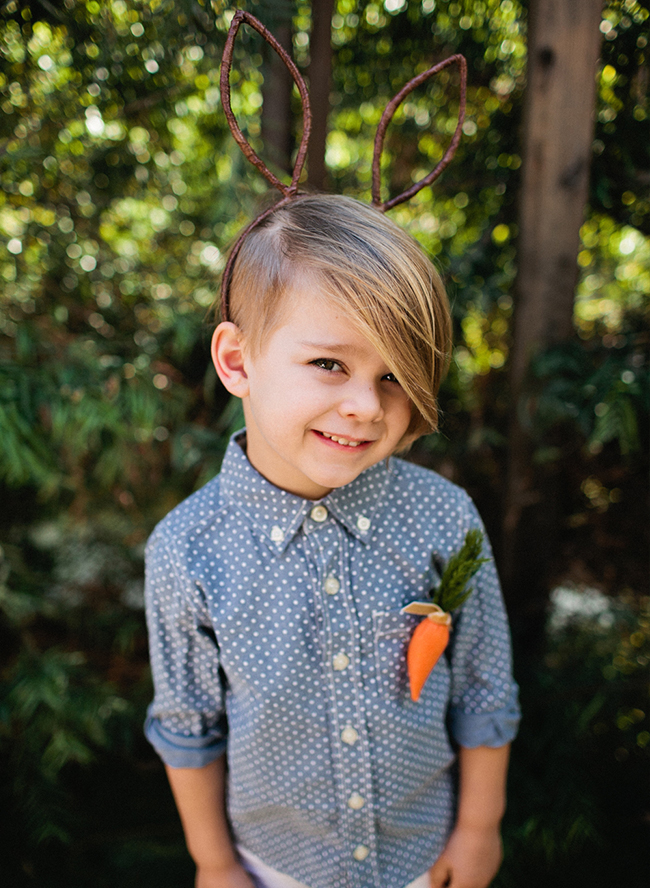
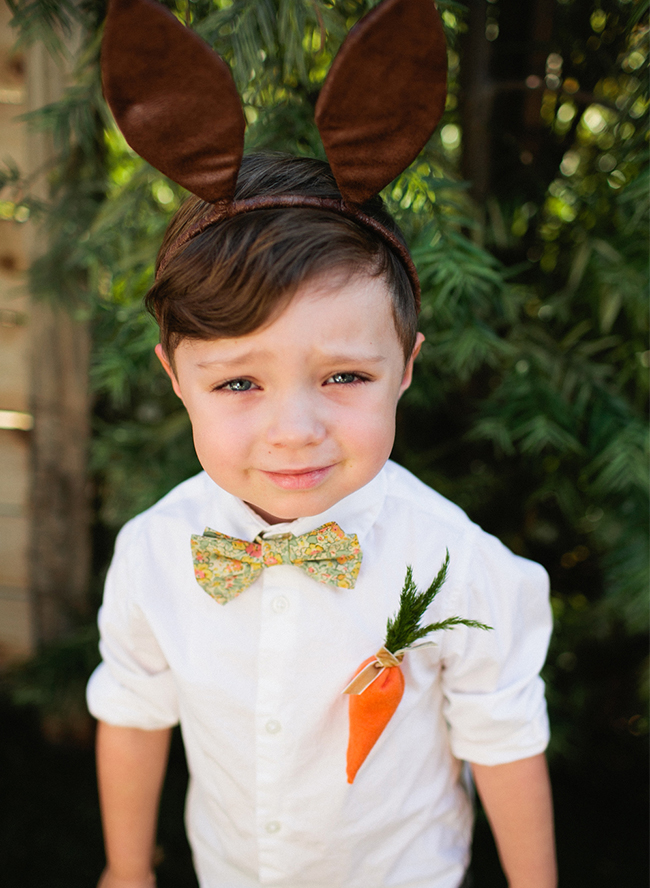
We’re sharing not one, but three ADORABLE Easter DIYS for your little ones to wear – and love! – this weekend! The two creative mamas behind Little Style Collective, showered their girls & boys in Easter surprises in anticipation of the upcoming holiday. They crafted sparkling Moroccan Easter baskets for the girls, and leather bunny ears & carrot boutonnieres for the boys. How cute is that?! They’re giving us the step by step below. Create these as a sweet surprise for your kids or craft them alongside them!

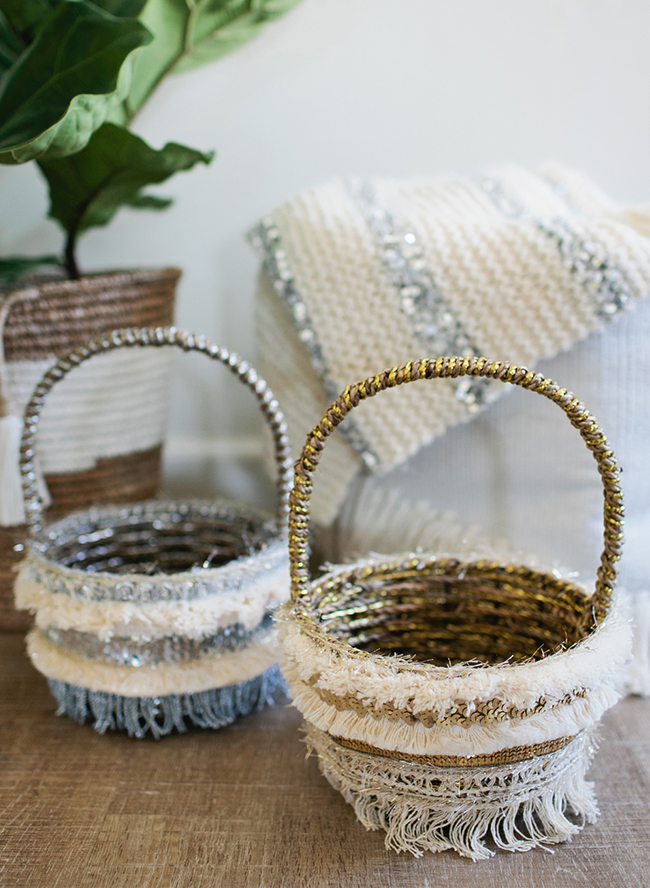
Moroccan Easter Baskets
What You Need
A Woven basket (we found our silver and gold threaded ones at Joann Crafts)
A Variety of trims – sequin, fringe, pom pom, etc
Scissors
Hot glue
Directions
This one is pretty easy! We just simply laid out a pattern of trims we liked and started gluing, making sure to balance out the sparkly sequins with natural textures:


Carrot Boutonnieres
What You Need
1 piece of orange felt
A Small piece of stuffing
Fake greenery (we found ours at Joann Crafts)
A Small piece of velvet ribbon
Tiny rubber band
Scissors
Hot glue
Safety pin

Directions
1. Cut your felt into a small 3×3 inch square
2. Wrap felt around stuffing into a cone shape and secure with hot glue
3. Push stuffing down and cut off excess felt on the top, making sure you have a tiny bit left to pinch
4. Stuff the greenery into the top of the “carrot” and pinch closed
5. Secure the pinch with a tiny rubber band (we used a toddler girls one)
6. Wrap your velvet around the carrot top and tie in a knot (we glued ours down as well)
7. Now just safety pin to your dapper little guy’s shirt!

Leather Bunny Ears
Open Frames:
What You Need
Bunny ear frame (we found ours at Target. As an alternative you could create ears using pipe cleaners and secure to a thin plastic headband)
Faux leather fabric (we found ours at Joann Crafts)
Scissors
Hot glue gun
Directions
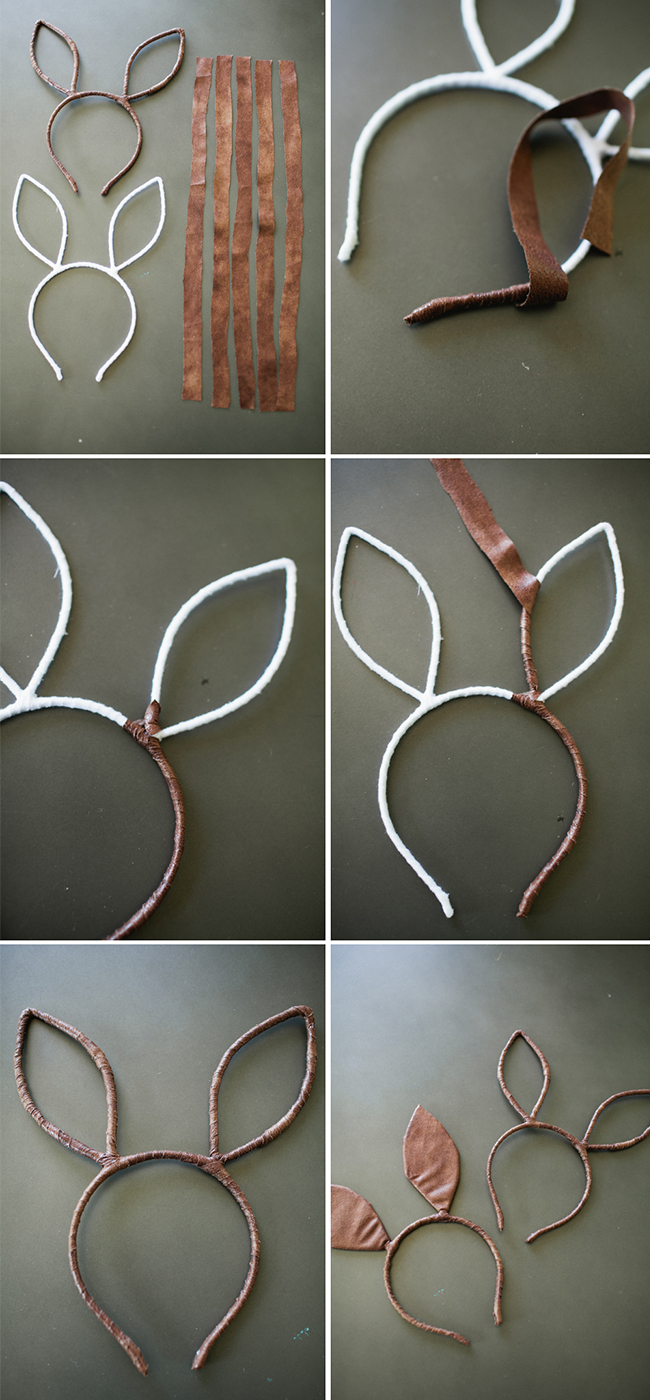
1. Start by cutting strips of leather fabric – about 1/2 inch wide. Roughly you will need 6 strips to cover your ears.
2. Starting at the base of the headband, wrap the leather around, working up from the ends and towards the ear
3. Wrap each ear as you get to it. Once you run out of a strip secure it with a pinch of hot glue and add another strip on top of it, keeping the glue hidden. Continue until you have covered the entire headband
4. Cover and secure the end with glue
Closed Ears:
What You Need
Faux leather fabric (we found ours at Joanne Crafts)
Scissors
Hot glue gun
Directions
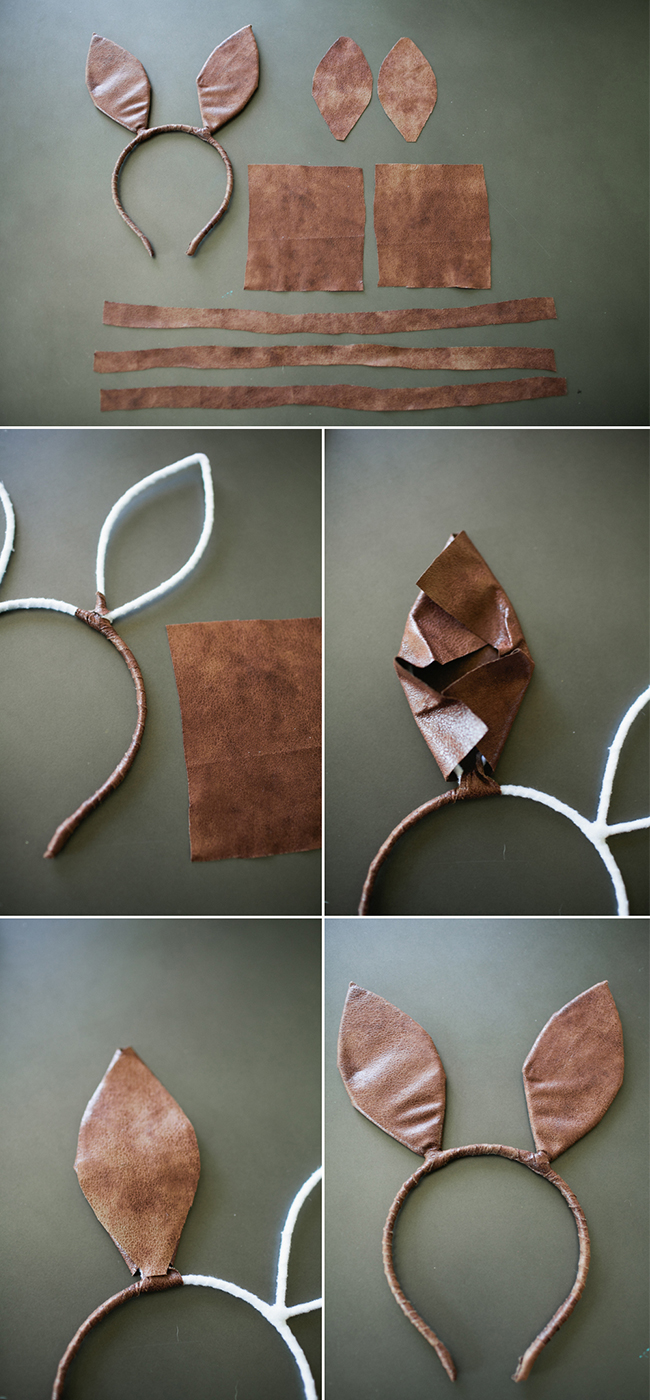
1. Start by cutting 3 strips of leather fabric – about 1/2 inch wide
2. Then cut 2 squares of fabric a little larger than your bunny ear (ours were 3×4 inches)
3. Cut two bunny ear shaped pieces of fabric to cover the back of your ears (just trace over the frame)
4. Start by wrapping one strip of leather around the end of the headband making your way to the ear
once you are at the base of the ear adhere your strip with glue
5. Grab your square and wrap it around the bunny ear securing it with hot glue ( its okay if its a little messy it will be covered)
6. Now get your bunny ear shaped piece and glue it over the messy piece you just attached
7. Adhere another strip of leather and continue wrapping until you get to the next ear
8. Repeat the steps to cover ear number two. Continue wrapping strip of leather until finished (note- when you run out of a strip simply glue it to the base and glue a new strip on top of it.)


This is too adorable! I am definitely trying these diy’s with my little ones!
these are the cutest things ever!
stop it. those baskets are the cutest!
Too freakin’ cute! Absolutely obsessed with these.
I can’t handle these!